








Instrument Care & Maintenance Guide
Ensuring Maximum Performance, Hygiene, Precision & Service Life
Proper care and maintenance are essential for preserving the quality, sharpness, functionality, and appearance of professional beauty instruments. Whether used in salons, spas, medical aesthetics, or personal grooming, correctly maintained instruments provide safer treatments, longer service life, improved client satisfaction, and reduced replacement costs.
This guide applies to stainless steel beauty instruments, including:
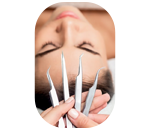
- Eyelash Extension Tweezers
- Eyebrow Tweezers
- Nail Nippers
- Cuticle Nippers
- Nail Scissors
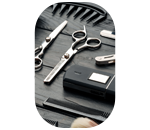
- Hairdressing Scissors
- Cuticle Pushers
- Nail Cleaners
- Pedicure Instruments
- Comedone Extractors
- Manicure & Pedicure Tools
- General Care Principles
Proper maintenance begins immediately after each use.
✔ Clean Immediately
Never allow blood, tissue, skin particles, adhesive, lotions, or cosmetic residues to dry on the instrument.
Dried contaminants:
- Become difficult to remove
- Encourage bacterial growth
- Increase corrosion risk
- Reduce instrument performance
Always clean instruments as soon as possible after use.
✔ Handle Instruments Carefully
Professional beauty instruments are precision tools.
Avoid:
- Dropping instruments
- Throwing into trays
- Stacking heavy tools together
- Using excessive force
- Using instruments for unintended purposes
Misuse can permanently affect alignment and cutting performance.
✔ Use Only Intended Purpose
Each instrument is designed for a specific application.
Examples:
Instrument | Intended Use |
Eyelash Tweezers | Lash extension isolation & pickup |
Cuticle Nipper | Removing dead cuticles |
Nail Nipper | Cutting thick nails |
Hair Scissors | Hair cutting only |
Nail Cleaner | Cleaning under nails |
Never substitute one instrument for another.
- Cleaning Procedure
Step 1 – Remove Gross Debris
Immediately after use:
- Rinse under lukewarm running water.
- Remove visible debris.
- Do not use hot water initially, as it may fix proteins onto the surface.
Step 2 – Prepare Cleaning Solution
Use:
- Neutral pH detergent
- Enzymatic instrument cleaner
- Manufacturer-approved cleaning solution
Avoid:
- Household detergents
- Abrasive cleaners
- Chlorine bleach
- Strong acids
- Strong alkalis
Step 3 – Manual Cleaning
Using a soft nylon brush:
Clean:
- Tips
- Hinges
- Serrations
- Box joints
- Grooves
- Springs
Pay special attention to difficult-to-reach areas.
Step 4 – Ultrasonic Cleaning (Recommended)
For professional environments:
Use an ultrasonic cleaner with enzymatic solution.
Benefits:
- Removes microscopic debris
- Cleans hinges thoroughly
- Improves sterilization efficiency
- Extends instrument life
Follow equipment manufacturer’s instructions.
Step 5 – Rinse Thoroughly
Rinse with:
- Distilled water (preferred)
- Clean deionized water
Ensure all detergent residues are removed.
Step 6 – Dry Immediately
Dry using:
- Lint-free cloth
- Medical-grade drying towel
- Compressed air
Never leave instruments wet.
Moisture causes:
- Rust
- Water stains
- Mineral deposits
- Corrosion
- Inspection Before Sterilization
Inspect every instrument carefully.
Check for:
✔ Proper alignment
✔ Sharp cutting edges
✔ Smooth movement
✔ Loose screws
✔ Cracks
✔ Bent tips
✔ Corrosion
✔ Stains
✔ Pitting
Damaged instruments should be repaired or replaced immediately.
- Lubrication
Moving parts require regular lubrication.
Apply:
Medical-grade instrument lubricant
Focus on:
- Hinges
- Box joints
- Springs
- Pivot screws
Benefits:
- Smooth movement
- Reduced wear
- Prevents corrosion
- Extends service life
Do not use household oils.
- Sterilization
Proper sterilization protects both technician and client.
Steam Autoclave (Preferred)
Typical cycle:
- Temperature: 121–134°C
- Pressure: As specified by the sterilizer
- Time: According to sterilizer manufacturer’s instructions
Always follow your sterilizer’s validated cycle.
Chemical Sterilization
When heat-sensitive procedures require it:
Use only approved disinfectants or sterilants.
Follow:
- Correct dilution
- Exposure time
- Rinsing requirements
Never exceed recommended soaking time.
UV Cabinets
Important:
UV cabinets are storage devices only.
They are not sterilizers.
- Storage
Proper storage is as important as cleaning.
Store instruments:
- Dry
- Clean
- Dust-free
- Low humidity
- Away from direct sunlight
Use:
- Sterilization pouches
- Protective sleeves
- Instrument trays
- Storage cases
Keep cutting edges protected.
- Instrument-Specific Care
Eyelash Extension Tweezers
Avoid:
- Dropping
- Tip collisions
- Glue buildup
Clean adhesive using approved adhesive remover.
Store with tip protectors.
Hairdressing Scissors
Clean after every haircut.
Oil pivot daily.
Check tension regularly.
Never cut:
- Wire
- Plastic
- Paper
- Fabric
Only hair.
Nail Nippers
Clean hinge thoroughly.
Lubricate frequently.
Do not twist while cutting.
Cuticle Nippers
Cut dead cuticle only.
Never cut live skin.
Keep blades sharp.
Store closed.
Cuticle Pushers
Remove residue immediately.
Avoid scratching polished finishes.
- Corrosion Prevention
Although stainless steel resists corrosion, improper care can still cause rust.
Prevent corrosion by:
- Drying completely
- Using distilled water
- Removing chemical residue
- Avoiding chlorine
- Avoiding saline solutions
- Proper lubrication
- Sharpening & Maintenance
Professional sharpening should be performed only by qualified technicians.
Frequency depends on:
- Usage
- Material being cut
- Cleaning practices
- Storage conditions
Never sharpen precision tweezers using sandpaper or files.
- Routine Maintenance Schedule
Frequency | Maintenance Task |
After Every Use | Clean, rinse, dry, inspect |
Daily | Lubricate moving joints (if applicable) |
Weekly | Deep clean and inspect alignment |
Monthly | Check screws, hinges, spring tension, and cutting performance |
Every 6–12 Months | Professional sharpening and servicing (depending on use) |
- What to Avoid
Never:
❌ Leave instruments soaking overnight
❌ Use bleach
❌ Use hydrochloric acid
❌ Use abrasive pads
❌ Store while wet
❌ Drop instruments
❌ Force instrument movement
❌ Use damaged instruments
❌ Sterilize dirty instruments
❌ Mix clean and contaminated tools
❌ Store loose cutting instruments together
❌ Use household oils
- Troubleshooting Guide
Problem | Possible Cause | Solution |
Rust Spots | Moisture or chemical residue | Clean, dry thoroughly, apply instrument lubricant |
Stiff Joint | Lack of lubrication | Lubricate hinge and exercise movement |
Poor Cutting Performance | Dull edges or misalignment | Have the instrument professionally sharpened or adjusted |
Corrosion | Improper cleaning chemicals | Use only neutral-pH cleaners and dry immediately |
Adhesive Build-up (Tweezers) | Lash adhesive residue | Use an approved adhesive remover and clean promptly |
- Best Practices Checklist
✔ Clean immediately after each use
✔ Use approved cleaning agents
✔ Dry completely before storage
✔ Lubricate moving parts regularly
✔ Inspect for wear or damage
✔ Sterilize according to professional guidelines
✔ Store in a clean, dry, protective case
✔ Sharpen only by qualified professionals
✔ Replace damaged instruments promptly
✔ Keep maintenance records in professional salon or clinical settings
Commitment to Quality
At Cielo Beauty, every instrument is manufactured with precision-engineered stainless steel to deliver exceptional performance, reliability, and durability. Proper care and maintenance are essential to preserving the quality of your instruments and ensuring safe, hygienic, and professional results.
By following the recommendations in this guide, your instruments will maintain their precision, appearance, and functionality for years of dependable service, helping you consistently deliver the highest standard of care to your clients.